 English
 Español
Product Consultation
Your email address will not be published. Required fields are marked *
Most sensor night lights can be installed in under 5 minutes with no electrician, no wiring, and no special tools. The majority of modern models are plug-in or adhesive-mount designs that simply require inserting the unit into a standard wall outlet or peeling off a backing strip and pressing it into place. Whether you are setting one up in a hallway, bathroom, staircase, or bedroom, the process is straightforward — and this guide walks you through every step, type, and consideration to get it right the first time.
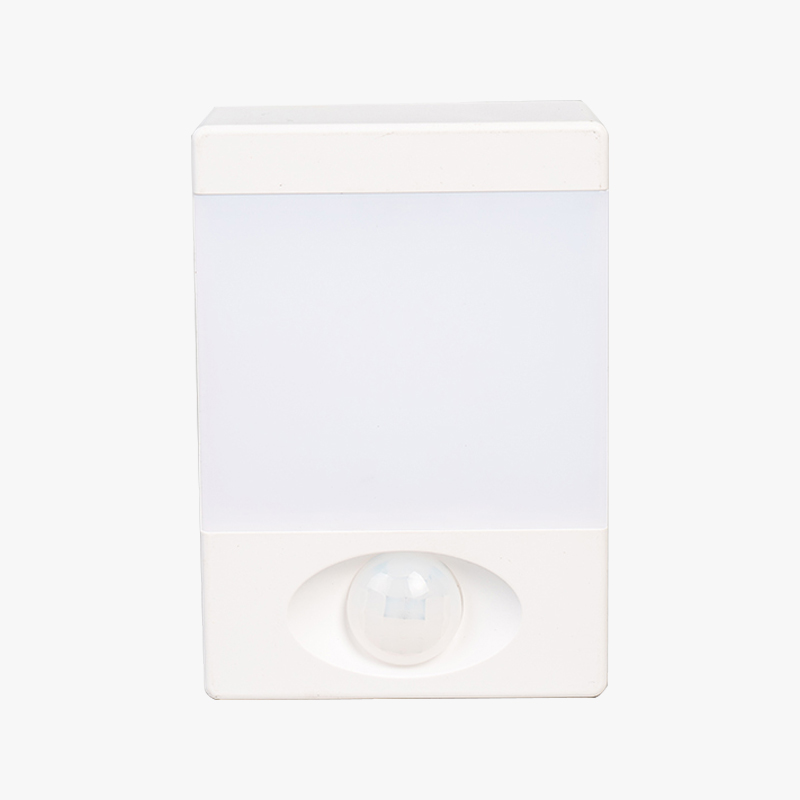
Sensor night lights use passive infrared (PIR) technology to detect the heat signature of a human body within a set range — typically 3 to 15 feet (1 to 5 meters) — and automatically switch on when motion is detected. After the person leaves the detection zone, the light shuts off after a preset delay, usually between 15 seconds and 3 minutes. Because they use LED light sources, they consume very little power — often just 0.5 to 2 watts — making them economical to run around the clock.
Content
Before picking up your tools — or skipping them entirely — it helps to know which type of sensor night light you have. Installation steps differ by design, and choosing the right type for each location makes a big difference in performance.
| Type | Power Source | Installation Method | Best Location |
|---|---|---|---|
| Plug-in | Wall outlet (AC) | Insert into outlet — done | Hallways, bathrooms, bedrooms |
| Battery-powered | AA/AAA or rechargeable | Adhesive strip or screws | Stairs, closets, cabinets |
| USB rechargeable | Built-in battery, USB charged | Magnetic mount or adhesive | Under-cabinet, bedside, garage |
| Hardwired | Direct electrical wiring | Replaces existing light fixture | Outdoor entryways, porches |
| Solar-powered | Solar panel + battery | Stake or wall-mount (screws) | Garden paths, driveways, fences |
For indoor use, plug-in and USB rechargeable models are the easiest to install and are the most popular choice. Battery-powered models offer the most flexibility in terms of placement. Hardwired models provide the most seamless look but are the only type that may require a licensed electrician if you are not comfortable working with electrical wiring.
For plug-in, battery-powered, and USB rechargeable models, you need very little. For screw-mount or hardwired installations, gather the following before you begin:
For hardwired models only, you will also need a voltage tester, wire stripper, wire connectors, and ideally a helper to hold the fixture while you connect the wires. Always turn off the circuit breaker before touching any wiring.
This is the simplest installation method. The entire process takes less than two minutes for most users.
That is all it takes. No screws, no drilling, no wiring. The light will now automatically turn on in the dark when it detects body heat and turn off shortly after the area is empty.
Battery-powered models give you complete freedom over placement — no outlets required. They are ideal for staircases, closets, under cabinets, and anywhere an outlet is not conveniently located.
USB rechargeable sensor night lights are increasingly popular because they eliminate the recurring cost of batteries while still being wire-free during use. A single charge typically lasts 30 to 90 days depending on the frequency of activation and battery capacity.
Where you place the sensor night light matters as much as how you install it. A poorly positioned unit can miss motion entirely or trigger constantly due to heat sources and air movement.
Many sensor night lights include adjustable settings that let you fine-tune behavior for your specific location. These are usually small rotary dials or toggle switches on the side or rear of the unit, labeled with icons or letters.
| Setting | What It Controls | Recommended for Hallway | Recommended for Bathroom |
|---|---|---|---|
| Sensitivity (LUX) | How dark it must be to activate | Medium to high | High (activates only in dark) |
| Detection range | Distance at which motion triggers the light | 8–12 feet | 5–8 feet |
| Auto-off delay (TIME) | How long the light stays on after motion stops | 30–60 seconds | 60–120 seconds |
| Brightness level | Intensity of the LED output | Low to medium | Low (avoid disrupting sleep) |
If your unit is triggering too often (for example, from pets or shadows), reduce the sensitivity dial. If it is not triggering when you walk in front of it, increase sensitivity or check that the sensor window is clean and unobstructed.
Understanding how the technology works helps you troubleshoot and optimize placement. Sensor night lights rely on Passive Infrared (PIR) detection, which does not emit any signal of its own — it simply reads infrared radiation (heat) that already exists in the environment.
The PIR sensor contains a pyroelectric crystal that generates a small electrical signal when exposed to infrared radiation. When a warm body — typically between 36°C and 37.5°C (97°F to 99.5°F) for humans — moves across the sensor's field of view, the radiation level changes and triggers the circuit to switch the LED on. The sensor's detection zone is shaped like a cone or fan, generally covering a 90° to 120° horizontal angle and a 60° to 90° vertical angle.
The light source itself is almost always an LED (Light Emitting Diode), chosen because LEDs:
A secondary sensor — the photoresistor or ambient light sensor — prevents the light from activating in daylight. This is what makes the unit truly automatic: it only monitors for motion when it is already dark enough to need the light.
If the light is not behaving as expected after installation, these are the most common issues and how to fix them:
Beyond convenience, sensor night lights offer meaningful practical benefits for households of all types:
Studies consistently identify poor nighttime lighting as a leading factor in household falls, particularly for older adults and children. Illuminating stairways and hallways immediately upon entry reduces the risk of tripping or misjudging steps. Automatic activation means there is no fumbling for a switch in the dark — the light is simply there when you need it.
A sensor night light consuming 1 watt that activates for an average of 30 minutes per night uses approximately 0.5 kWh per month. Compare this to leaving a 10-watt LED bulb on all night: that bulb consumes roughly 3 kWh per month — six times more energy. Across a home with five or six sensor night lights, the savings add up meaningfully over the course of a year.
For young children, a sensor night light in the hallway or bathroom allows them to navigate safely at night without needing to call for a parent. The automatic shut-off also ensures the light does not stay on all night and disrupt their sleep. For pets, the motion activation is a gentler option than permanent lighting, and many models are designed to ignore motion below 18 inches — reducing unwanted activations from small dogs and cats.
Use this checklist to ensure a successful sensor night light installation every time:
Your email address will not be published. Required fields are marked *
Copyright ? Conbo Electronics Co., Ltd. All right reseved. Custom Led Lights Manufacturers Wholesale Outdoor Light Fixtures Factory


